|
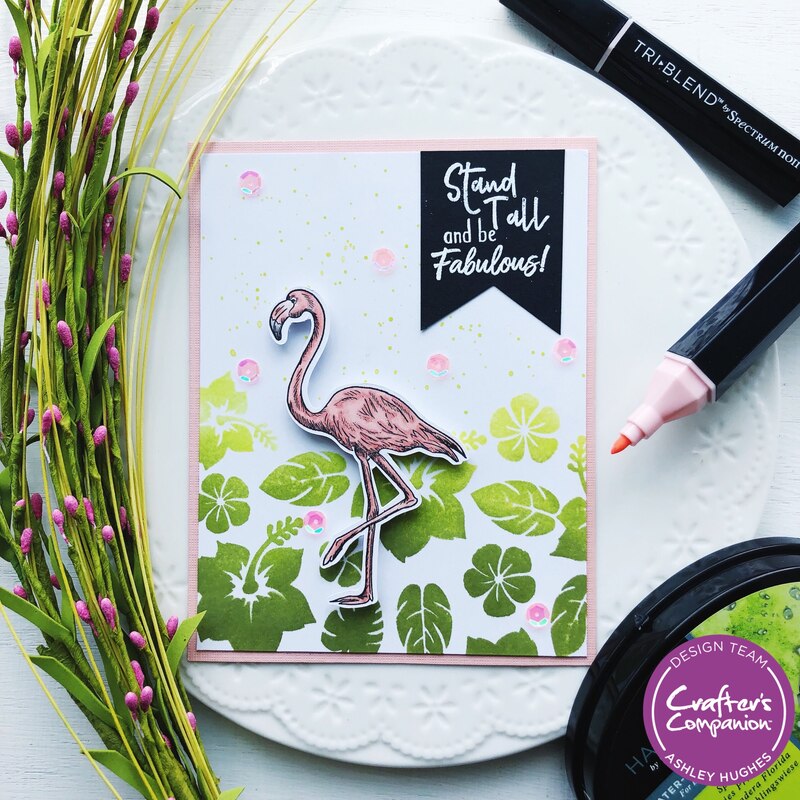
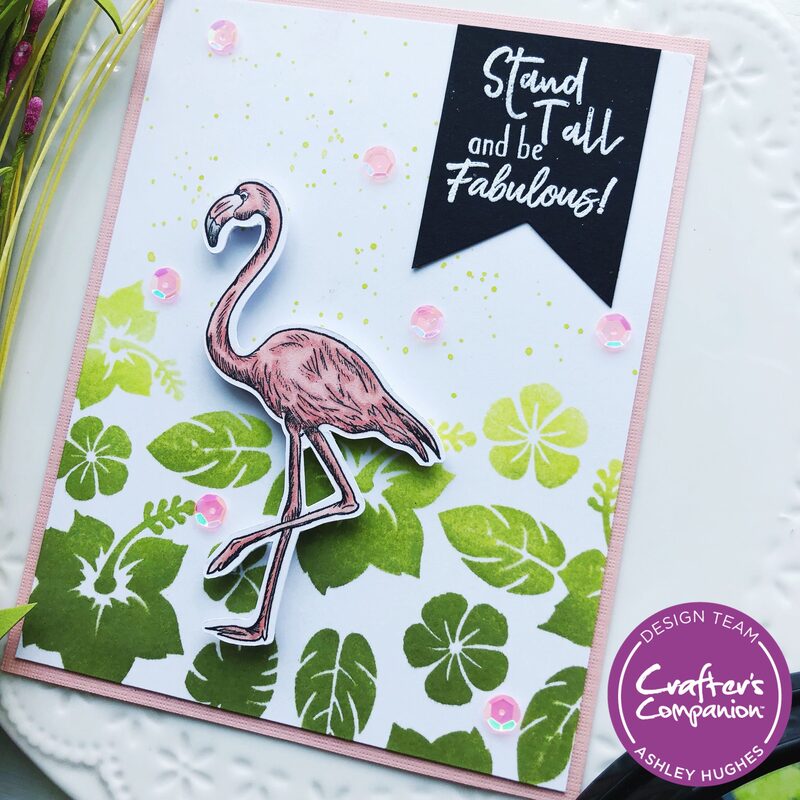
Today I have a fun tropical card to share with you! I used the "Spread Your Wings" stamp set from Crafters Companion for this card. This stamp set comes as a sheet of unmounted red rubber, which means you'll get super clean crisp lines! What i did was cut out each stamp with a sharp fine tip scissor, when i was ready to stamp with it I placed the stamp (back side up) in a cardboard box and sprayed with Elmers spray adhesive, let it dry for a few minutes then stuck it onto my stamping platform. Then stamped away! I used my silhouette to die cut this out but you could easily fussy cut too. The stencil I used was from Crafters Companion's new tropical release, this is the tropical hibiscus garden stencil, i used the spectrum noir harmony water reactive inks in spring meadow, grasshopper, and pine tree to get an ombre look. These inks are great for blending! To color the flamingo I used the Spectrum Noir tri-blend alcohol marker in pale pink. I added some Spectrum Noir crystal clear glitter ink as well. I stamped and cut out the sentiment and embossed it too. I matted my card on a pale pink piece of cardstock to finish off the look.

0 Comments
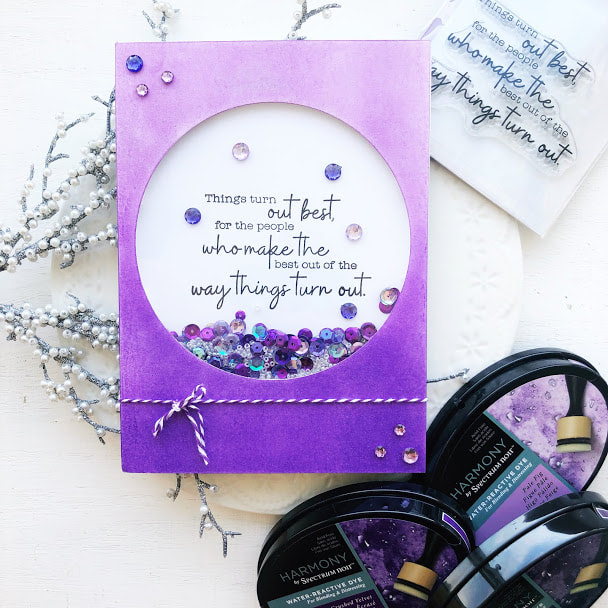
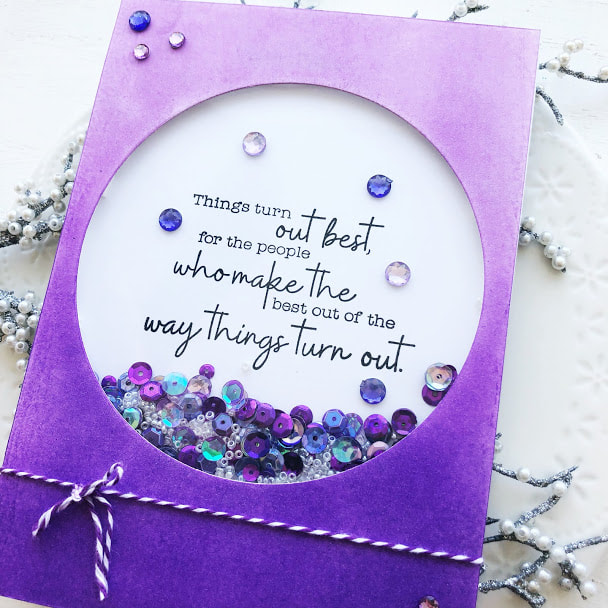
I love the sentiment on this stamp from Crafter's Companion, it's so true! For this card I created an ombre look using spectrum noir's harmony water reactive dye ink in pale fig, crushed velvet, and damson wine using a blending brush. I die cut a circle out of the middle (wait for it to dry so your dye cutting plates don't get inked up)! I adhered a piece of heat resistant acetate on the back side, then put foam tape on the edges and around the circle to hold the shaker ingredients! I tied some bakers twine to the card panel as well. Next I stamped the sentiment using a black pigment ink, then added a few adhesive backed gems around the sentiment. Lastly I added seed beads and sequins in coordinating colors and adhered the sentiment panel to the front card panel! I love making shaker cards, they're simple to make and they always put a smile on the recipients face!
Happy Summer everyone! I have some exciting news to share that hasn't made it's way to my blog yet so here it goes....I'm on the Crafters Companion design team!! It's pretty exciting! So i'll be creating cards using their products and designing cards that will be on HSN when they do their fun craft days! I'll be posting my creations on all my social media and show you the how to's here! I'll also be posting product links for you here as well, which is no cost to you and I may get a small commission from your purchases that help me continue to do what I do!! Today I wanted to share one of my most favorite cards i've made lately using Crafters Companion goodies!
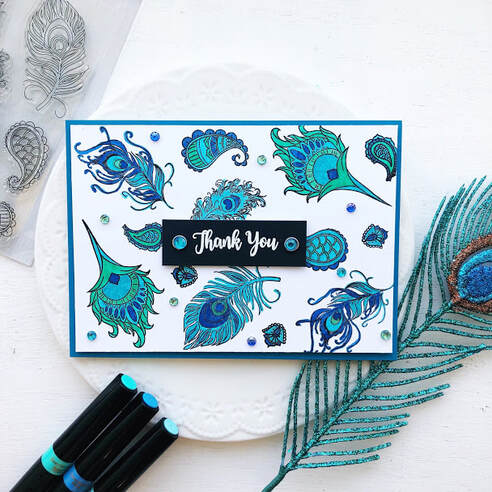
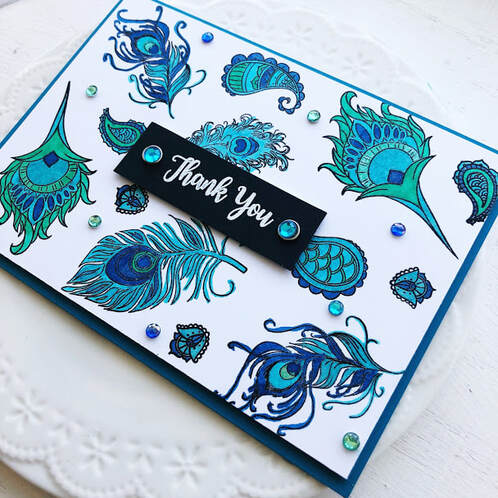
The card was created using the Paisley Peacock Stamp set and colored using Spectrum noir Sparkle pens-coastal cottage set. I used sea spray, cornflower, and pistachio. I used a white stamping cardstock and blue cardstock. I stamped the images in with a waterproof black ink, embossed it with clear embossing powder, and finished this card with some blue and green gems!
Hello everyone! Today i'm sharing a card I made using the "Treat Yourself" stamp set from The Letter Lingo stamp company. This stamp set will be released along with 2 others on 4/29! I'm part of the first design team so i've had an opportunity to play with these stamps so let me tell you about them first....These stamp sets are clear photopolymer and made in the USA, the quality is second to none! The stamp sets are each so versatile which makes creating cards so easy. It's also fun to combine stamp sets for cards- "Tea-rrific" and "Citrus twist" compliment each other really well! The backer is connected too, i'm not a fan when the clear backer can come completely off of a stamp set...it gets lost. Onto todays card!
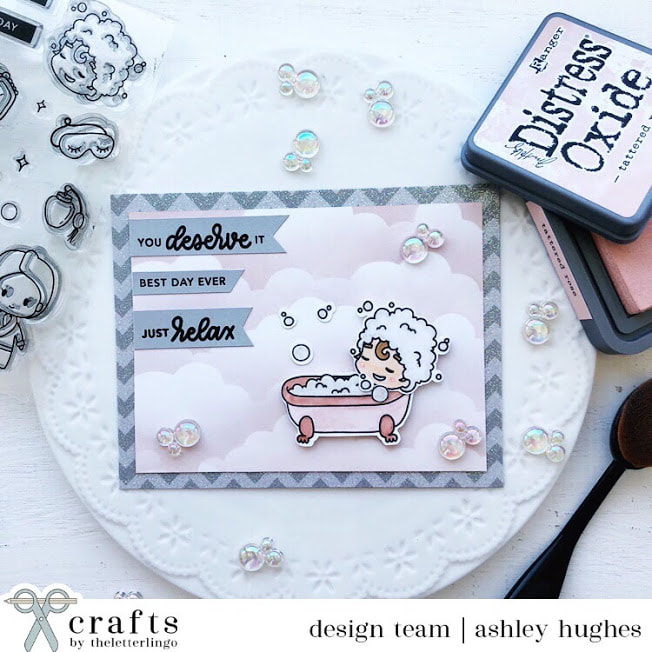
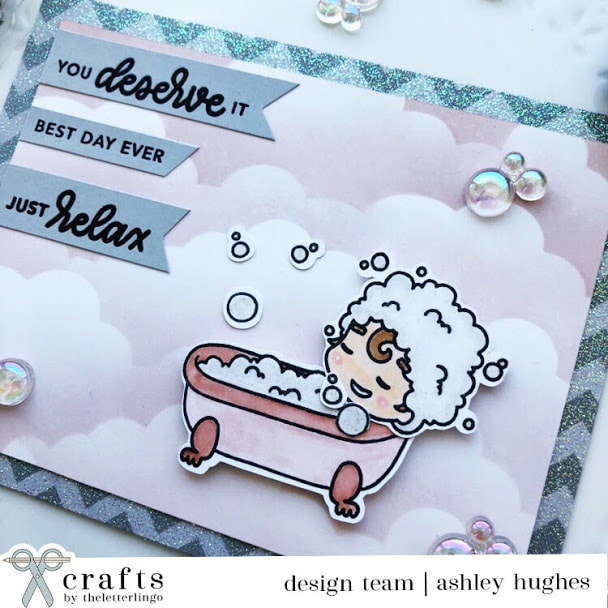
I created the background by using a cloud stencil I made using my silhouette cameo. I ink blended the clouds using Ranger distress oxide in tattered rose with a blending brush. The paper i used to create the cloud background is bristol smooth, it's really the best paper i've found for ink blending, I also used the same paper for coloring my stamped images. I adhered that to a piece of doodlebug chevron print glitter card stock that is 4 1/4 by 5 1/2. I stamped out my images using Gina K amalgam ink in jet black. This ink is great for alcohol markers, colored pencils with gamsol, and watercoloring! I used zig clean color real brush watercolor markers to color in my stamped images in pale pink and tea rose. I added a touch of pale gray to the bubbles in her hair and tub. I also used wink of stella over the bubbles to give them some shimmer! I adhered my images with double sided foam tape. I stamped the 3 sentiments with versafine black ink and embossed with clear embossing powder onto gray card stock. I adhered them to the cloud background with scotch ATG adhesive gun. Lastly I got these fun iridescent bubbles from hobby lobby specifically for this project! I though it they would be the perfect embellishments for this card! I adhered these to the cloud background using Ranger multi medium matte adhesive.
I hope you like this card, please feel free to leave me a comment with any questions you may have, or just to say hi! Check out my supply list below!
Hello! The topic of this post is all about cardmaking for beginners, this is the first part in a 3 part series. The next post and video will be cardmaking: advanced beginner, followed by a post and video about how to put it all together! This is dear to my heart, teaching others what I love to do- papercrafting! Or maybe i'm being an enabler for a new hobby (insert winky emoji)!! The videos i'm doing for these will be live and i'll post them so you can watch and refer back to anytime! I'm doing them live so I can answer questions as I go! Check out the video here and the links below!
The first thing you want to think about before you start cardmaking is what's your reason or goal. Maybe you want to learn a new hobby, expand your creativity, be able to make your own greeting cards for friends and family. Maybe you want to sell cards at craft shows or on Etsy. Maybe you want to work as a designer for crafty brands. It's a good idea to know what your reasons are before starting anything new. I'll be breaking this post and video in several sections; tools, paper, inks, adhesives, stamps, coloring mediums, and costs. My goal not to overwhelm you but to give you options and inform you of what essentials are necessary for a beginner cardmaker. Tools Paper trimmer Ruler Precision scissors (fine tip) Bone folder pencil dual ended eraser Paper White cardstock Black cardstock Watercolor paper Adhesives- you definitely don't need all of these i'm just giving you options Zig glue pen glue pen Old fashion Mounting squares Mono multi liquid glue Adtech tape runner Herma dotto Ranger Multi medium matte Foam adhesive in various shapes and sizes Inks Versafine black onyx Momento tuxedo black Stamps Types: Rubber stamps, cling stamps, clear stamps You'll want to have an idea of what type of images you are drawn to; cute, punny, floral, elegant... This will help you hone in on your style and prevent you from getting overwhelmed when purchasing stamps. With cling and clear stamps you'll need acrylic blocks to mount them onto for stamping your images. You'll also need something to clean the ink off of your stamps Coloring mediums Watercolors Colored pencils Markers Costs Papercrafting can become extremely expensive. I've personally been able to save a significant amount of money by only shopping sales, using coupons, and shopping online deals. Using Michaels, Hobby Lobby, JoAnns coupons to buy higher priced ideas such as your paper trimmer. Paper packs are often on sale at these stores as well. I have affiliate links (no cost to you but I may be a small commisssion) on some of the items i've talked about today. Scrapbook.com often has free shipping deals and amazing sales! You can find the stamps I use on scrapbook.com as well as the companies websites. You'll be able to create beautiful cards with only a few basics! Cardmaking and papercrafting in general has definitely sparked joy for me an I hope it will for you!
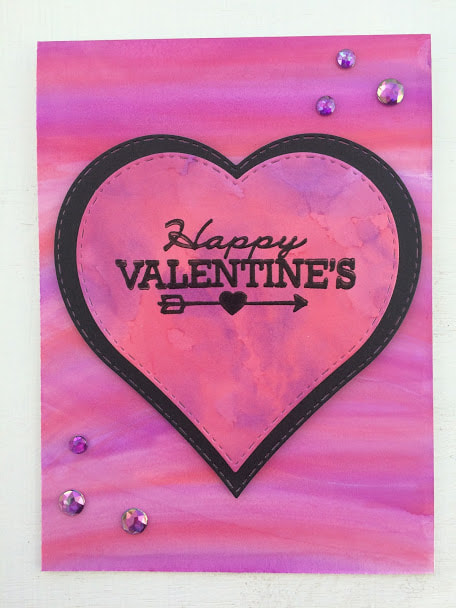
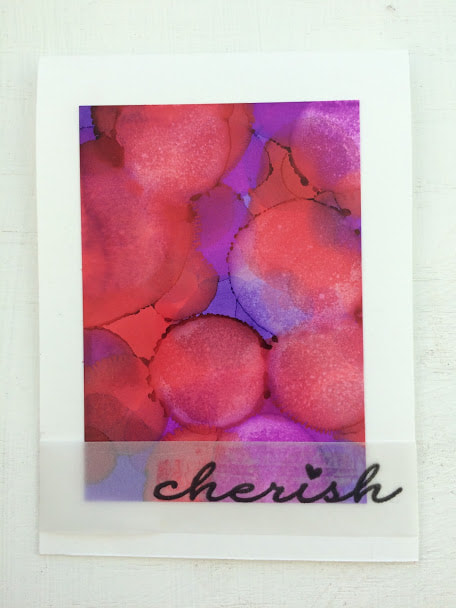
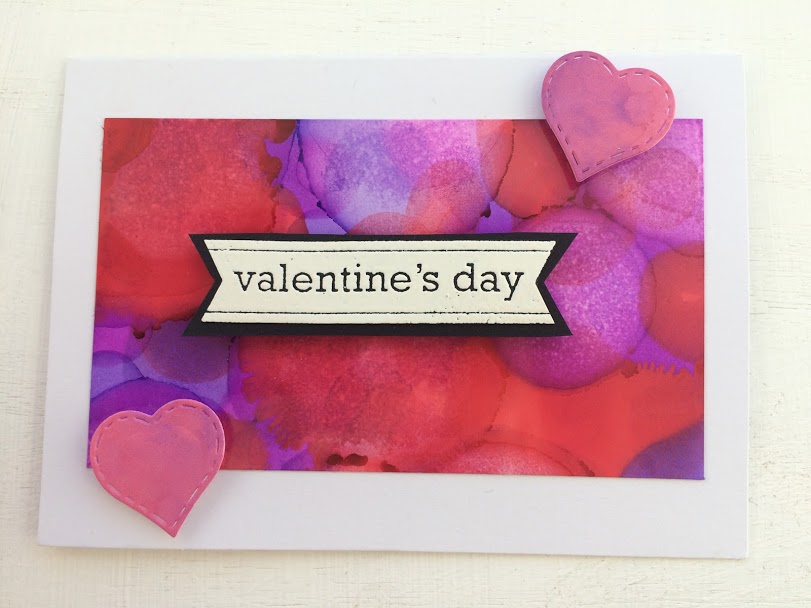
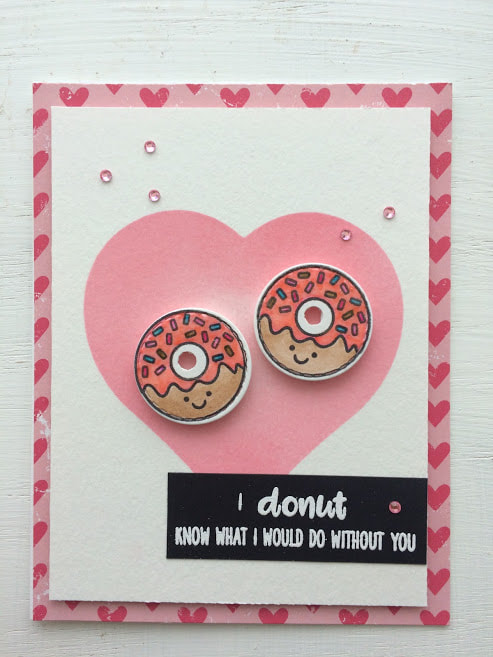
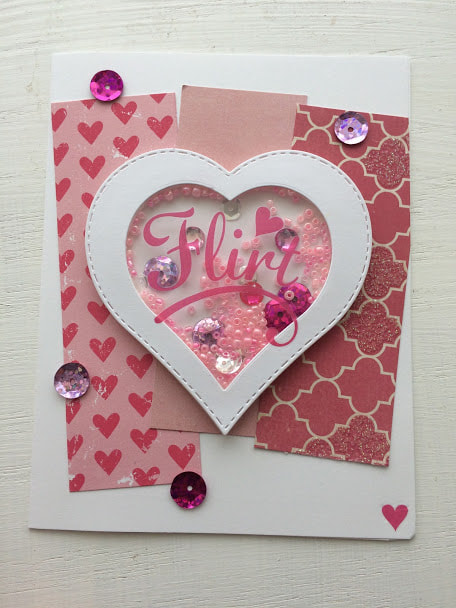
Hello! I'm totally in the Valentine's season spirit! It seems I go from Christmas and New Years strait to Valentines. The reason for this is because my daughter was born 3 days after Valentine's Day, so it has become a special time for our family! With that in mine, i've been busily creating Valentine's cards and crafts this year, but I wanted to share some of the Valentines cards I created last year! The first 4 cards were created with alcohol inks, the super adorable food pun cards are from Sunny Studio Stamps, and the last one is a fun shaker card! Links to where you can purchase the items I used to create these cards are below!
I'm an active card maker, scrapbooker, and just general crafter. I'll use to space to share tips, tutorials, reviews, and inspiration all related to paper crafting! I've been a paper crafter for about 25 years, so i bring a lot of experience with me to share with you!  What I want to here from you- what do you want to learn? what are your favorite stamps to work with? what do you want to see? Please leave a comment so I know you are here! |
AuthorWrite something about yourself. No need to be fancy, just an overview. Archives
July 2019
Categories |


 RSS Feed
Photos from Marco Verch (CC BY 2.0), verchmarco
